The Graduated Filter tool in Lightroom 4 allows you to apply edits across an even gradient. In this article I will explain 4 ways to use the Graduated Filter tool to enhance your photos.

I used a Graduated Filter to adjust exposure on the left side of this photo. Read on to see how.
Adding a Graduated Filter to a Photo

- Click the Graduated Filter tool, or use keyboard shortcut ‘M’
- Dial in the desired settings (exposure, color temperature, etc)
- Drag your mouse across the image, starting at the point where you want the filter to be the strongest. An easy way to remember this is that you start dragging your mouse from the area of the photo that you want to change. Create as large a gradient as you need to make the transition subtle.
- Adjust the size, position, and angle of the gradient, as well as its settings until you get the result you need.
4 Uses for the Graduated Filter Tool
1. Changing exposure on one side of the frame
In my own workflow, I use the Graduated Filter to change exposure more than for any other purpose. In Lr4 with the 2012 Process, you can control overall exposure, or target just the shadows or highlights. For this image of some sailboarders on a beach in Kamakura, Japan, I added a Graduated Filter to increase the exposure on the left side of the photo by about half of a stop.
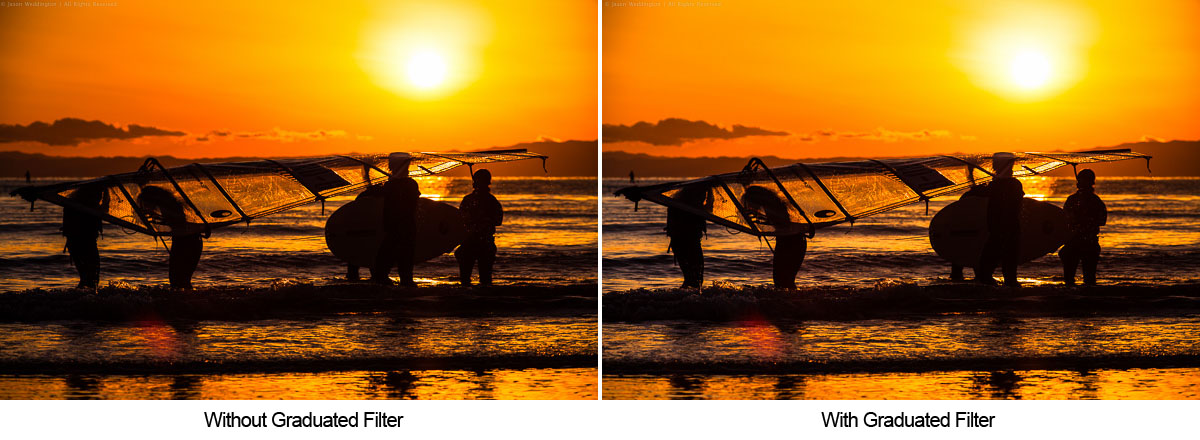
I used a graduated filter to increase the exposure on the left side of the image.

This Graduated Filter increases the exposure on the left side of the image by about 1/2 stop
2. Reducing atmospheric haze
Another good use for the Graduated Filter is in reducing haze in the distance for landscapes and cityscapes. I’ve found that increasing contrast, clarity, and sharpness across a vertical gradient can help reduce haze. Here, a Graduated Filter helps make the best of this image, shot on a particularly hazy day from the Metropolitan Government Building in Tokyo.

I used a Graduated Filter to reduce some of the haze and produce a final image with more detail.
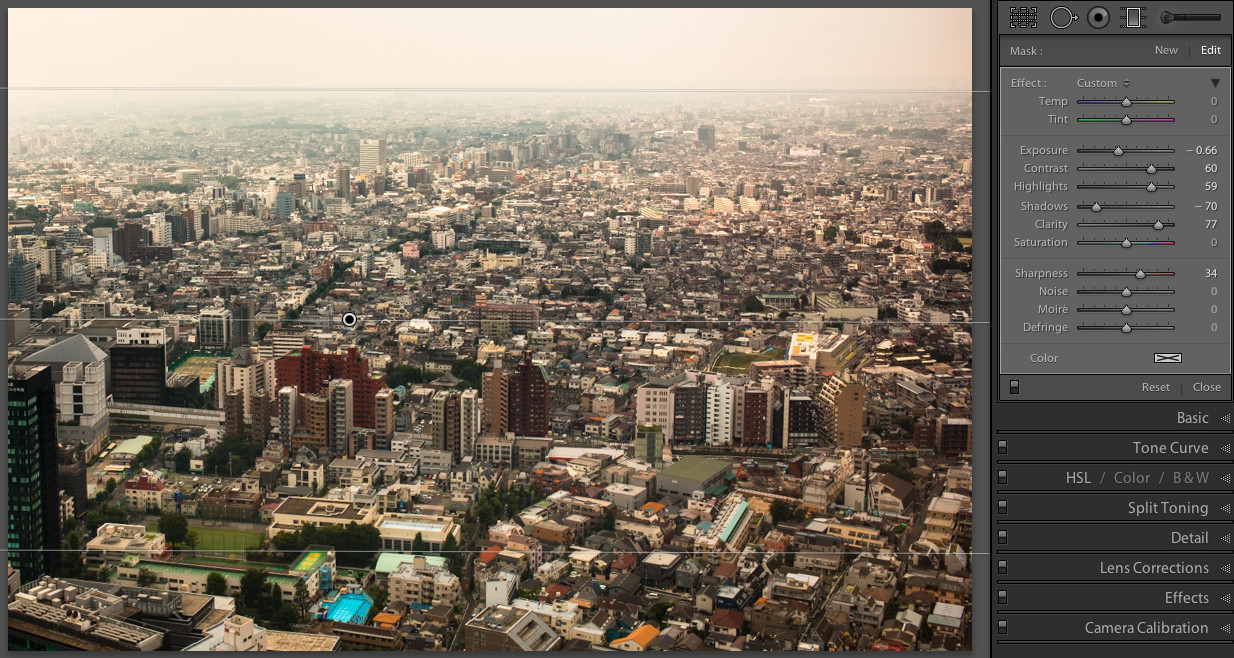
This Graduated Filter helps reduce the haze in the air.
3. Selectively Adjusting White Balance
Using the Temp and Tint controls in the Graduated Filter settings, you can adjust white balance across a gradient. This is an image of morning dew on rice plants in Takasaki, Japan. I used two Graduated Filters to separately enhance the sun flare and the rice grass.
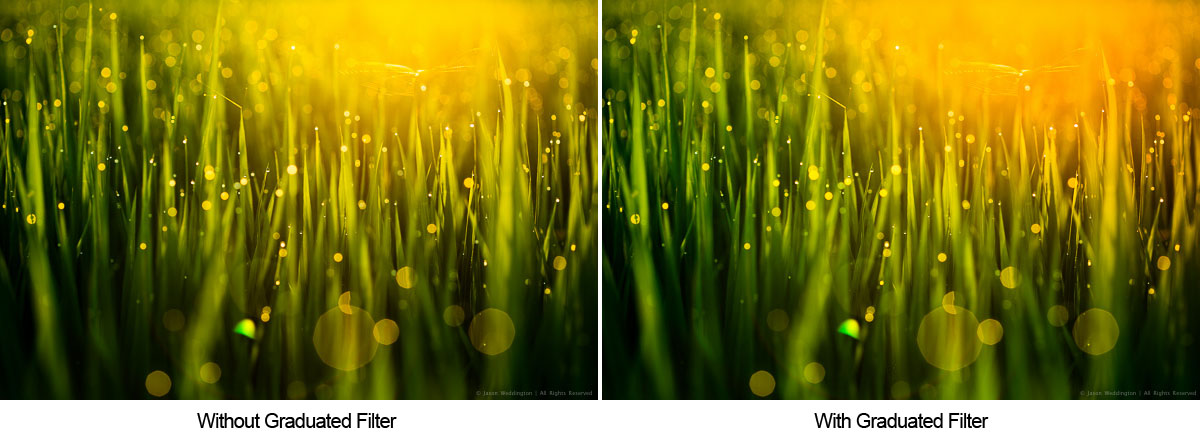
I used two Graduated Filters to separately emphasize the yellow and green tones.

This Graduated Filter enhances the yellow and pink in the sunrise
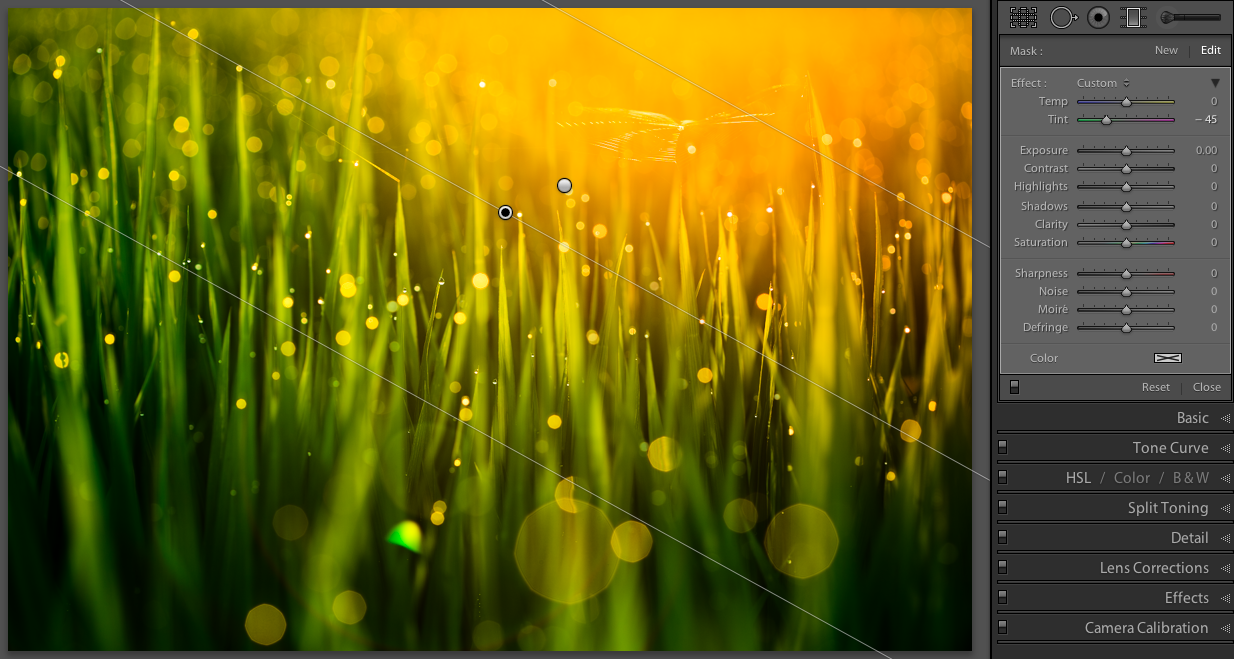
This Graduated Filter makes the grass more green.
4. Customizing a vignette effect
This technique builds on #1 above, because we are actually manipulating exposure. But I mention it separately because it’s a combination of two Lightroom effects. In some portraits, I like to use a subtle vignette to draw the eye to the subject. But the standard post-crop vignette is not effective at drawing the eye toward one side of the frame.
In these cases you can use a Graduated Filter to selectively modify the vignette, as in the natural light portrait below. A strong vignette darkens the outside of the frame, while an exposure gradient lightens the right side of the frame over the model’s face. This has the effect of pulling the viewer’s eye to the subject’s face.
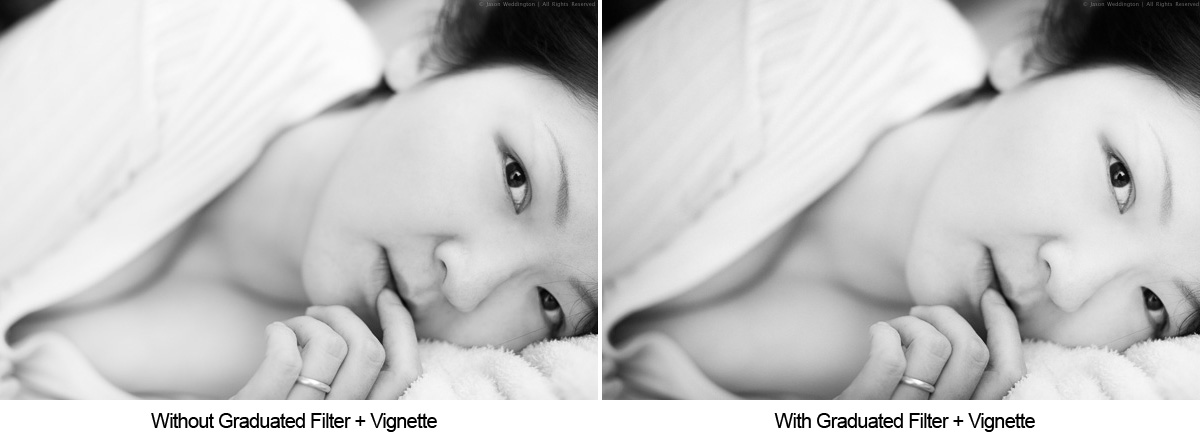
I used a Graduated Filter to remove the vignetting on the right side of the frame

This Graduated Filter counters the vignetting on the right side
I hope this article has been interesting and informative, and has given you a few ideas about how to use the Graduated Filter tool to enhance your images. I appreciate feedback, please comment below or feel free to connect with me through Facebook orGoogle+. I’ll do my best to answer questions and reply to comments.
No comments:
Post a Comment